| |
Lidar-Camera Calibration
Description: Lidar-Camera calibration converts data from these 2 sensors into the same coordinate system.Tutorial Level: BEGINNER
Contents
Before Starting
Make sure that you have the following:
a calibrated monocular camera that satisfies the standard ROS camera interface and therefore exports an image raw and a camera info topic
- a Lidar that produces a Pointcloud topic
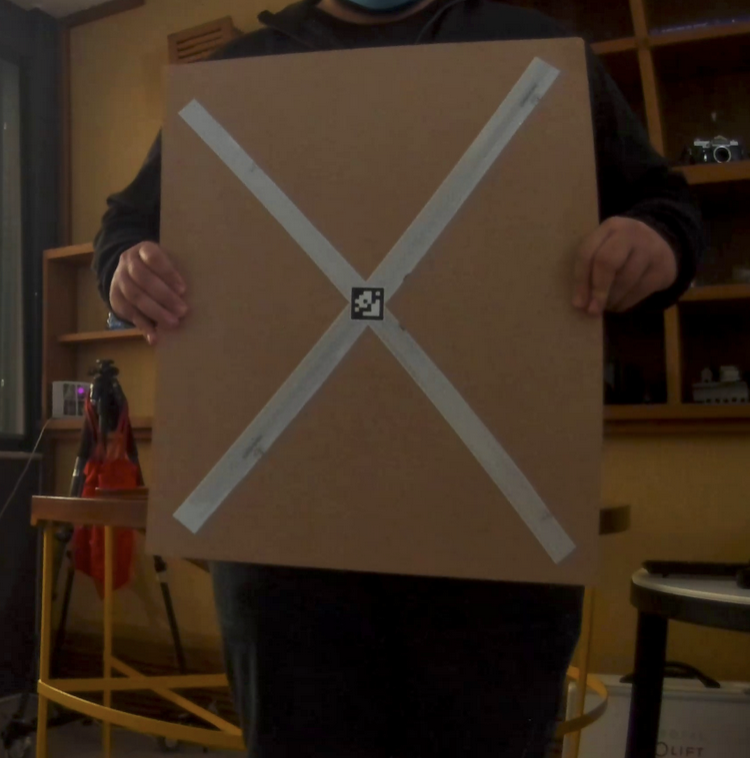
- a target that is made by two reflective tapes forming an intersection X (as shown in the following picture). This calibration target has been deployed, because it combines the integration of a visual fiducial mark (Apriltag), along with a lidar marker.

Installation
Start by installing all system dependencies using apt:
apt-get update && apt-get install -yq curl wget jq vim ros-noetic-cv-bridge python3-pip \
        python3-tk python3-numpy python3-rospy python3-rosbag python3-message-filters \
        ros-noetic-tf python3-opencv libegl1 qt5-default
First of all, we have to create a catkin workspace (provided there is an existing ROS installation):
mkdir -p /home/$USER/catkin_ws/src
cd /home/$USER/catkin_ws
catkin_make
Then clone the calibration repo:
cd ./src
git clone https://github.com/up2metric/cam2lidar
Create a conda environment, in order to install all required dependencies.
cd cam2lidar/
conda create -n calibration python=3.8.10
conda activate calibration
pip install -r requirements.txt
Calibration parameters setup
Set calibration parameters inside config folder , following the example.
# Clustering DBSCAN
clustering_eps: 0.5
clustering_min_samples: 10

# Detect apriltag
tag_family: "tag36h11"

# Detect pointcloud
# pcd segment plane
segment_dist_thres: 0.02
segment_ransac_n: 3
segment_num_iterations: 10000

# Ransac 1:
ransac1_min_samples: 2
ransac1_res_thres: 0.02
ransac1_max_trials: 5000

# Ransac 2:
ransac2_min_samples: 2
ransac2_res_thres: 0.02
ransac2_max_trials: 5000

# Geometric calibration
reproj_error: 8
intensity_thres: 200
distance_from_prev: 100
horizontal_dimension: 3840
vertical_dimension: 2160
grid_horizontal_division: 5
grid_vertical_division: 5
reproj_error: Reprojection error of PnP
intensity_thres: Lidar intensity threshold that is considered to be coming from the reflective tape
distance_from_prev: Distance (in px) from previous apriltag in order for the movement to be considered as static
horizontal_dimension/vertical_dimension: Dimensions of the image
grid_horizontal_division/grid_vertical_division: Shape of grid, in order to have one measurement per rectangle
Setup topics
Edit the launch file inside the launch folder geometric.launch (or temporal.launch accordingly) and set the image_topic and the lidar_topic.
<launch>
    <rosparam command="load" file="$(find cam2lidar)/config/geometric.yaml"/>
    <node pkg="cam2lidar" name="calibration_data_collection" type="geometric_calibration.py" output="screen">
        <param name="image_topic" value="/econ_cam_0/image_raw"/>
        <param name="lidar_topic" value="/velodyne_points"/>
        <param name="debug" value="False"/>
    </node>
    <node pkg="cam2lidar" name="Calibration_visualization" type="user_interface.py" output="screen">
        <param name="subscriber_name" value="/geometric_visualization"/>
        <param name="camera_info_topic" value="/econ_cam_0/camera_info"/>
    </node>
</launch>
Geometric calibration
After setting the calibration parameters as mentioned in section 3, launch the geometric calibration code.
roslaunch cam2lidar geometric.launch
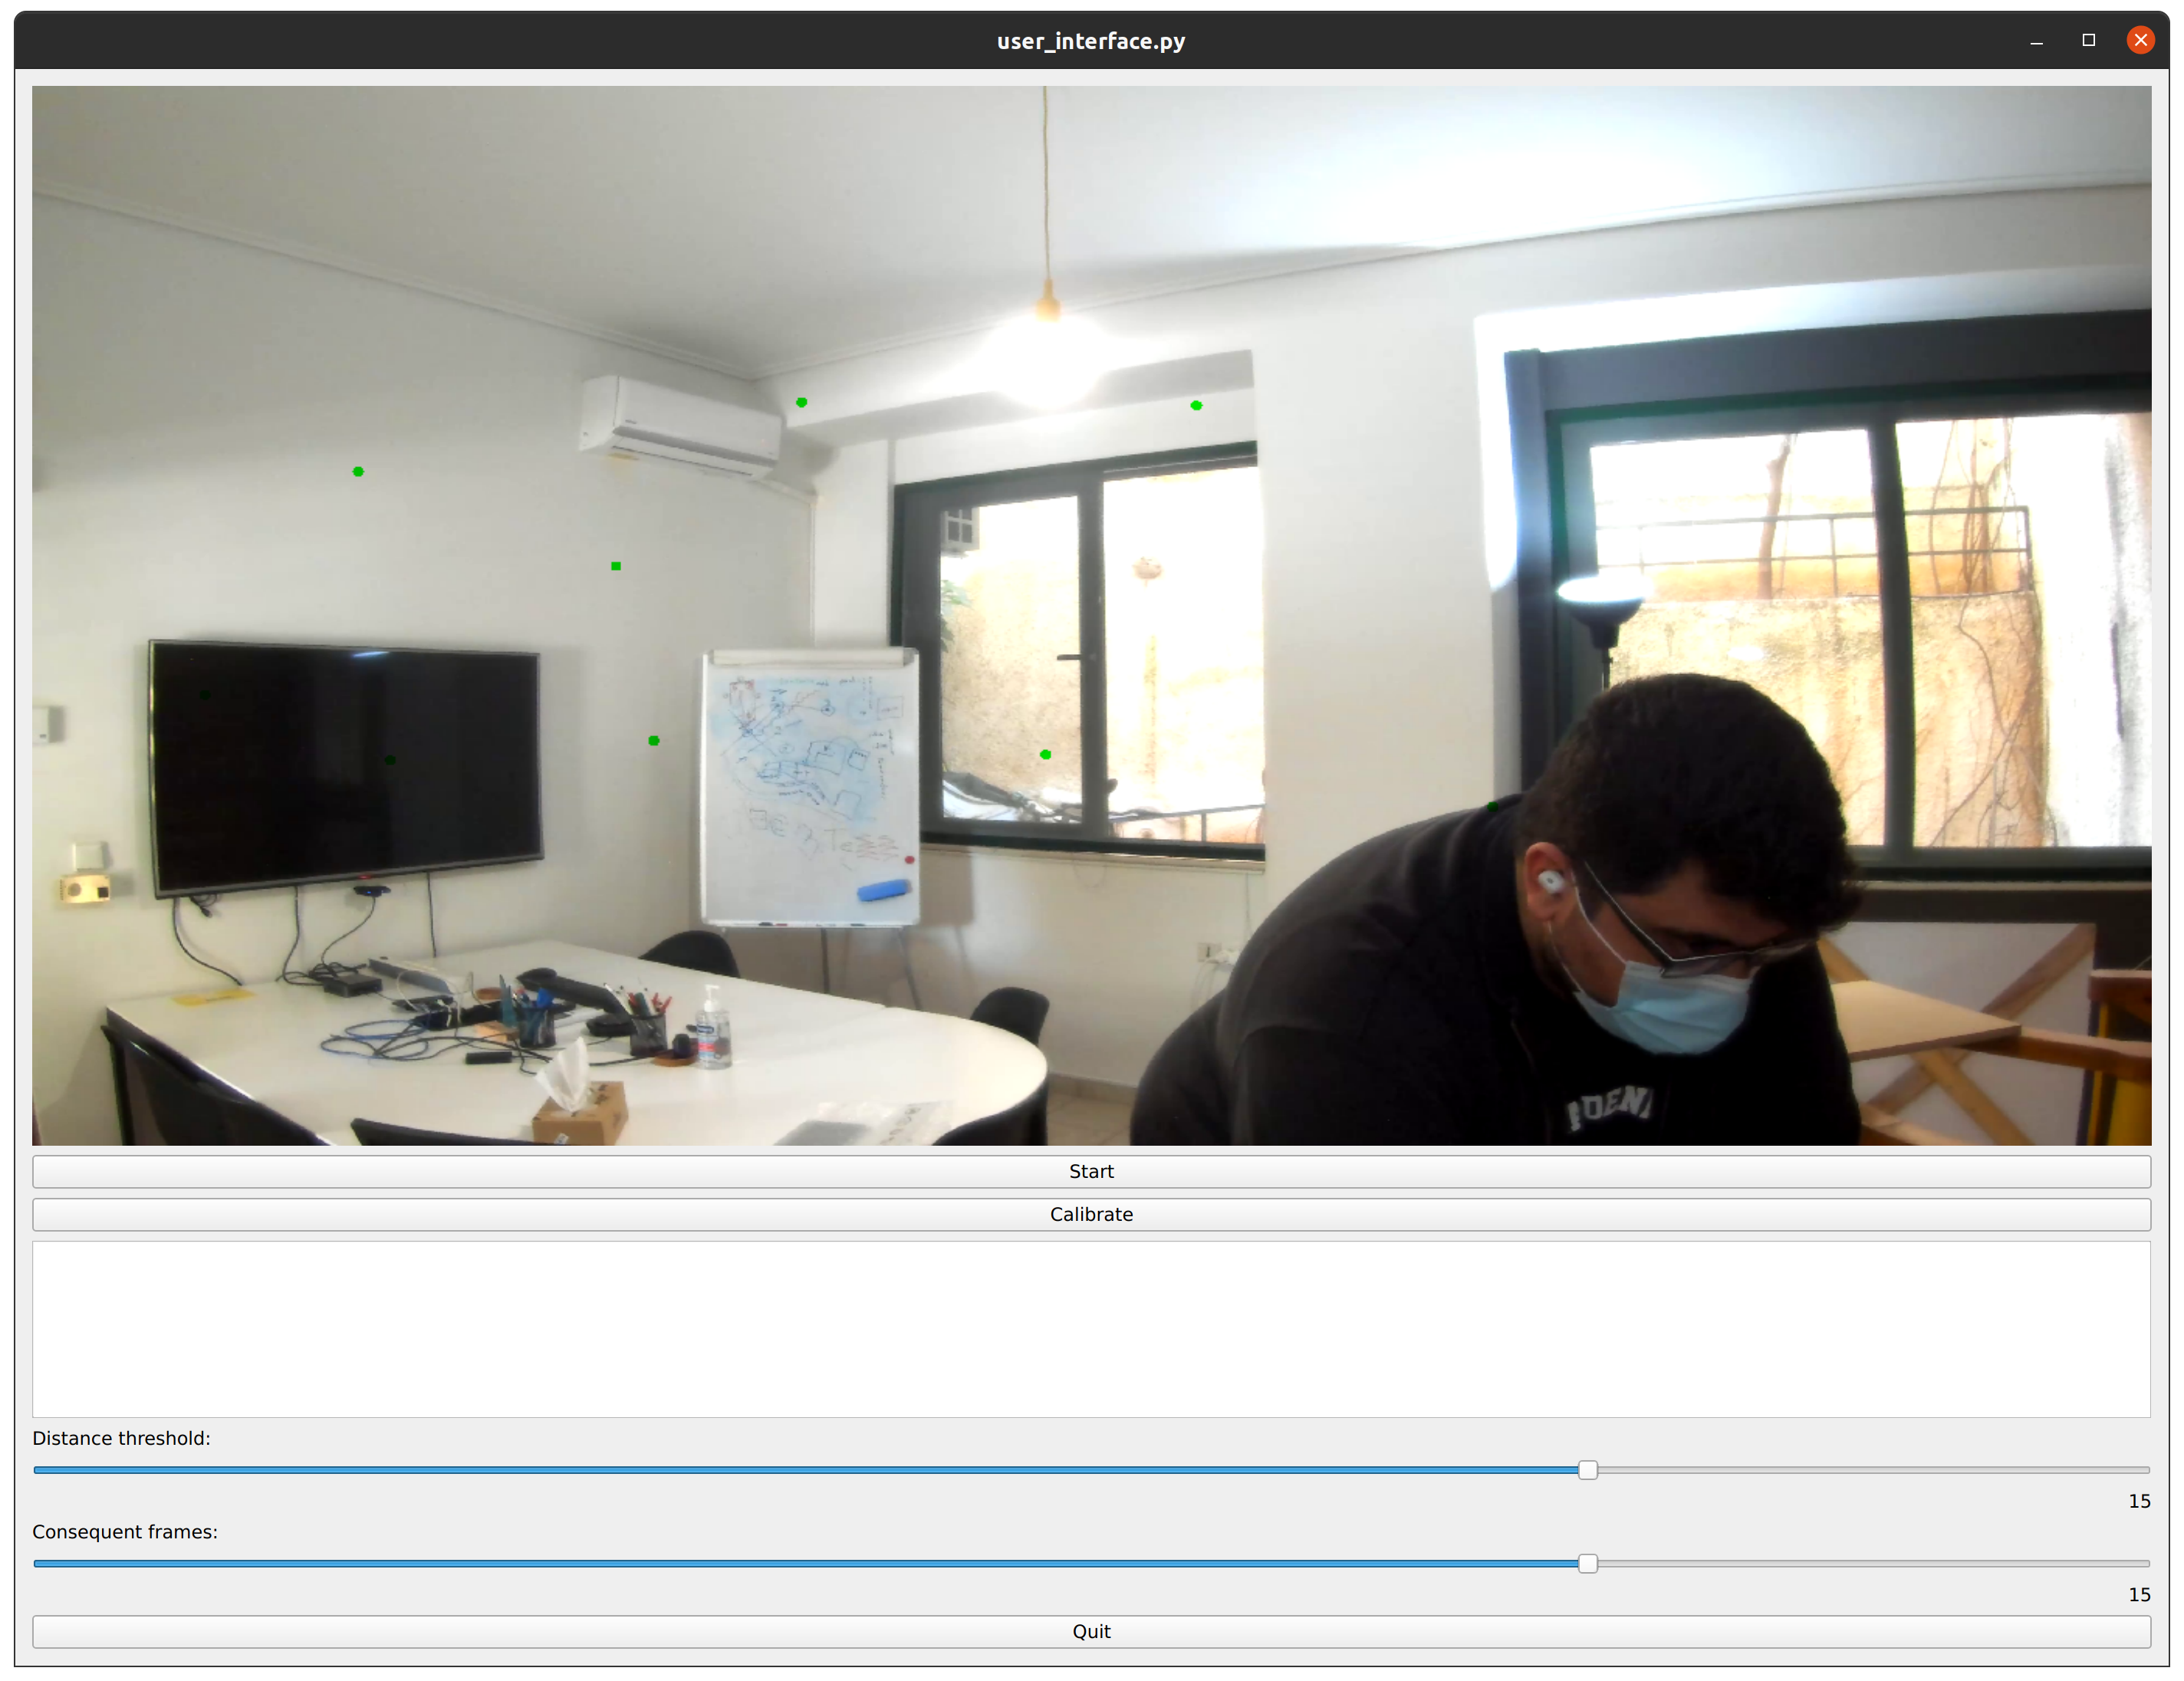
Using the user interface set the Distance Threshold and Consequent Frame parameters and press Start.
Distance Threshold: Distance threshold between consequent detected apriltags, in order for the displacement to be considered static.
Consequent Frames: Number of consequent static frames to be collected, in order to collect 1 point for calibration.

Temporal calibration
Same as Geometric calibration.
roslaunch cam2lidar temporal.launch


